India Visa for NRIs
If you’re an NRI (Non-Resident Indian) planning a trip to India—whether it’s to see family, handle property matters, attend a wedding, or just soak up the culture—this guide is for you.
The visa process can feel confusing, especially with different options like e-Visas, OCI cards, and regular visas. Here we present in a clear, friendly way, with links to official sites you can trust.
Step 1: Figure Out What You Actually Need
Before applying for anything, start here:
-
Still have your Indian passport?
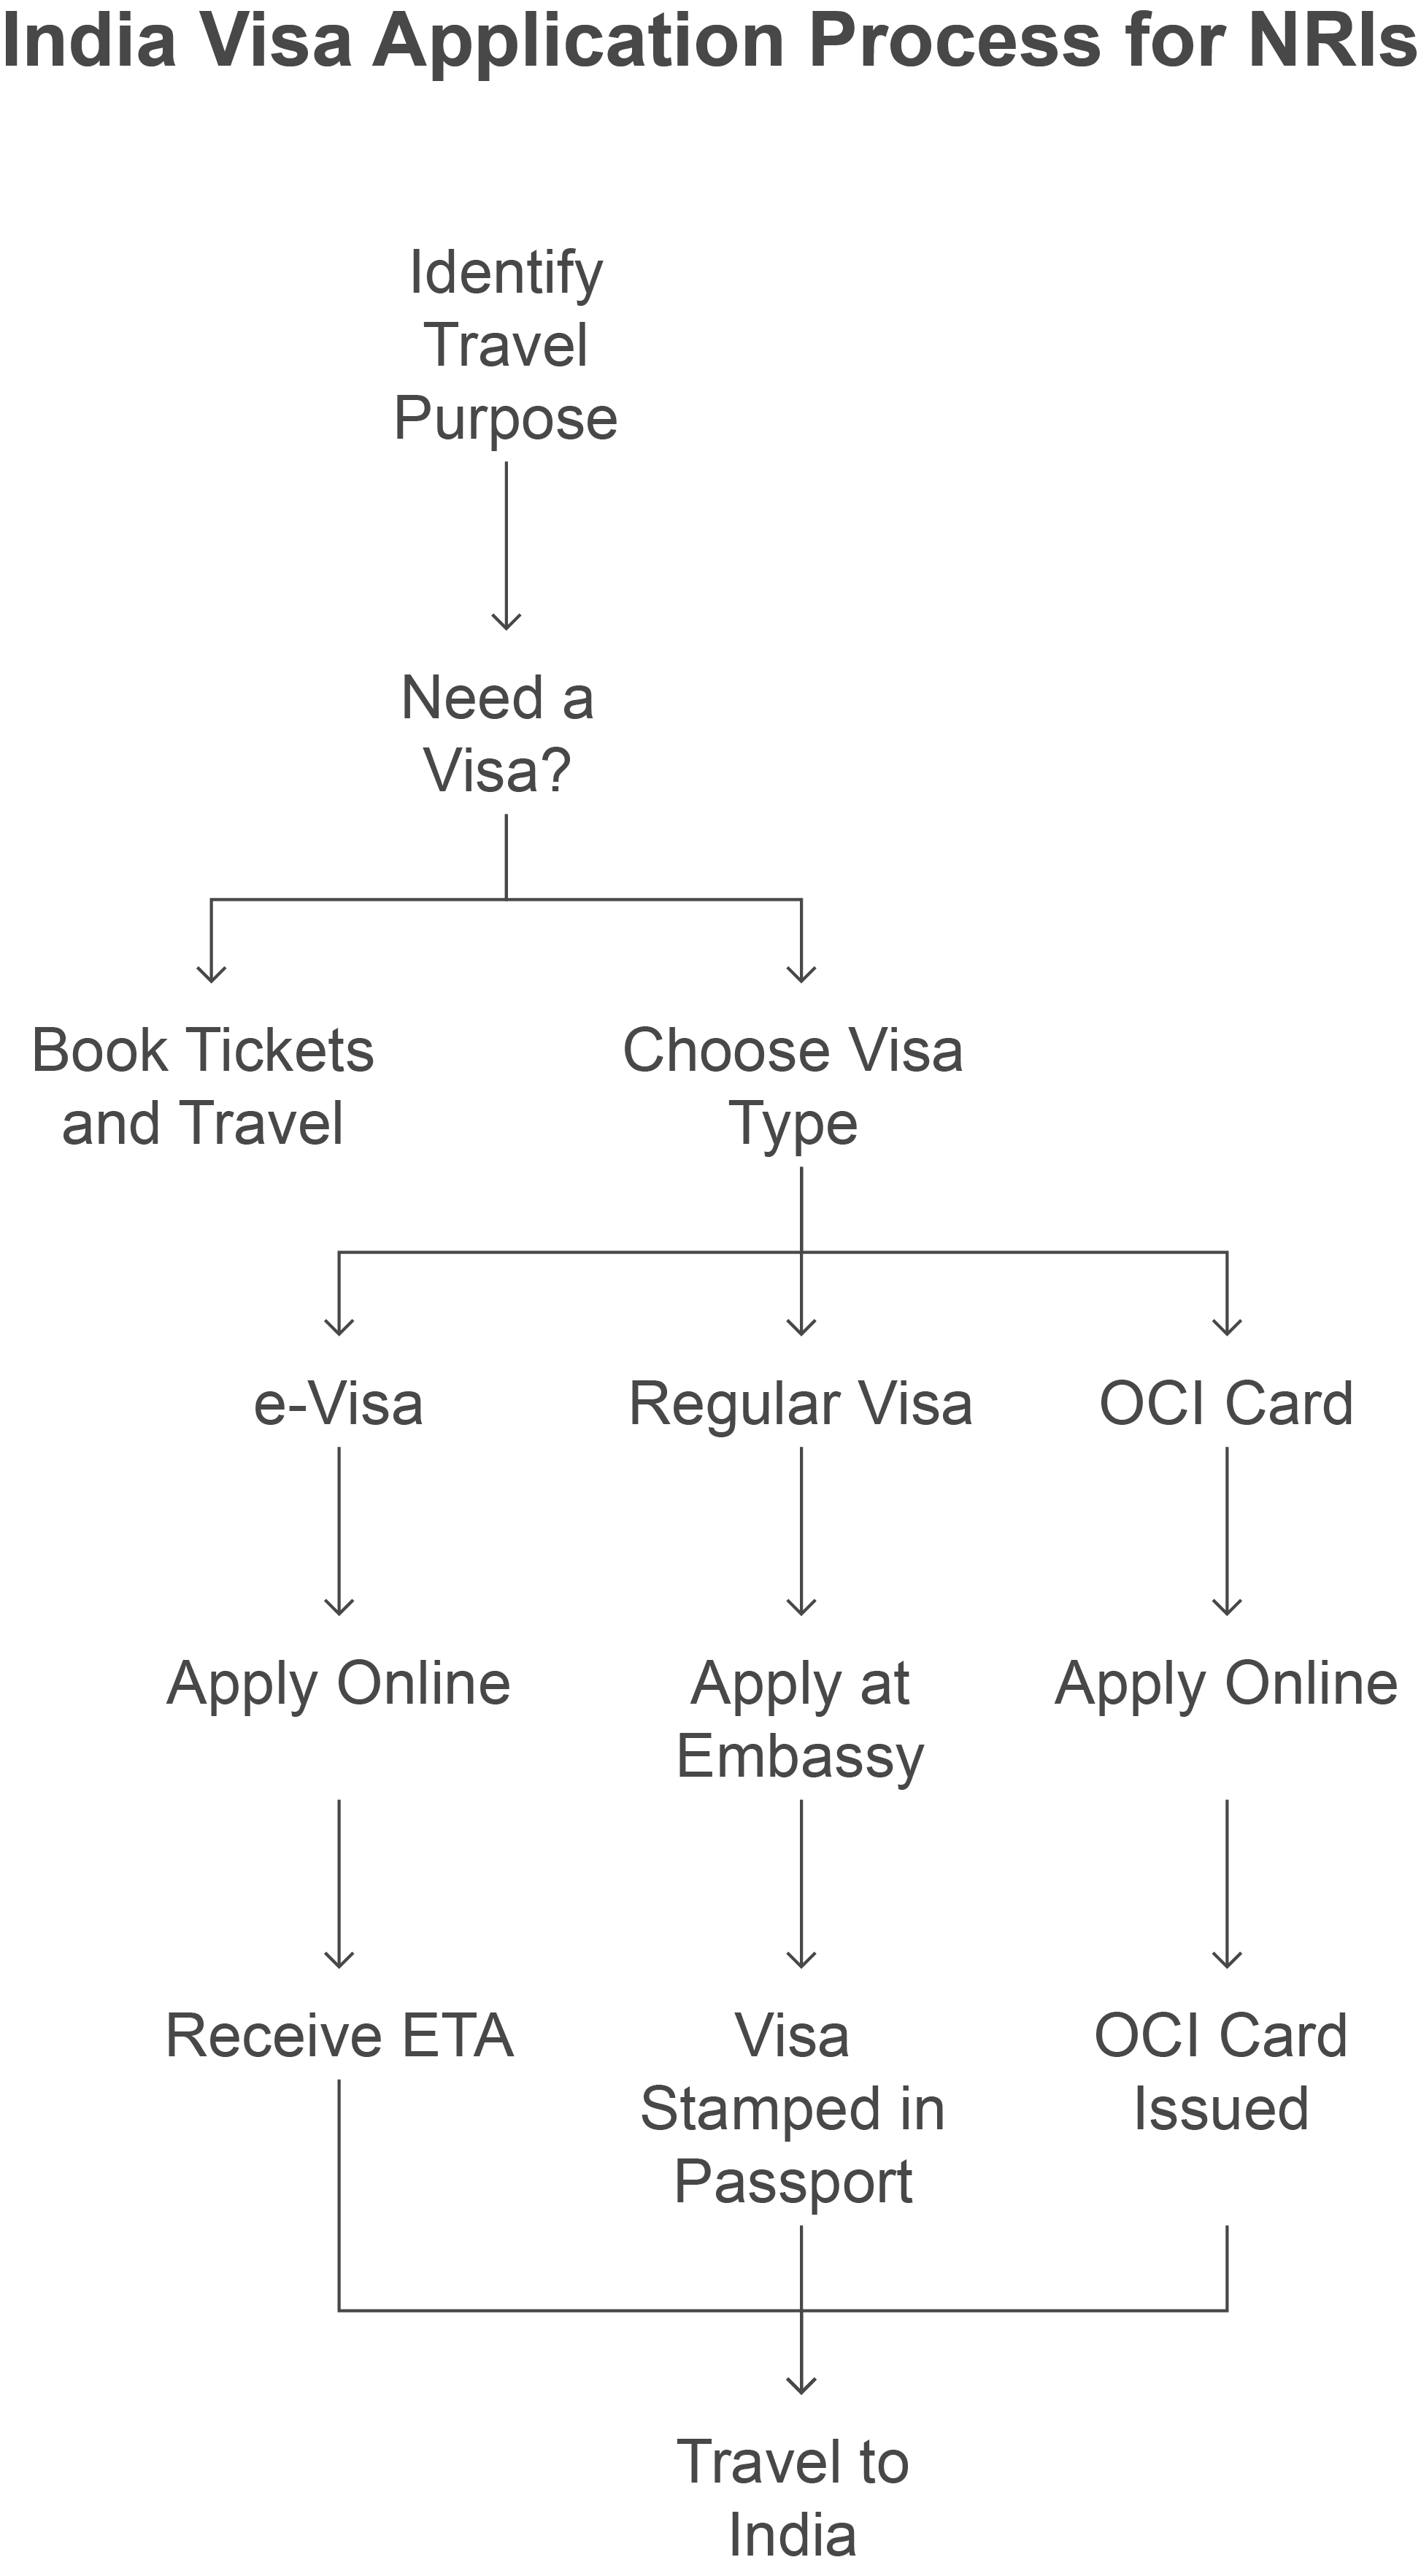
You don’t need a visa. Just book your tickets and go! -
Now a citizen of another country (like the US, UK, Canada, etc.)?
You’ve got two main options:
- Get an Overseas Citizenship of India (OCI) card – It’s like a lifelong visa.
- Apply for a regular Indian visa – For short-term visits like tourism or business.
Step 2: Want to Visit India Soon? Try the e-Visa
The Indian e-Visa is fast, easy, and all online. It’s perfect for short trips (30–60 days, depending on the visa type). Here are the most common options:
- e-Tourist Visa – For vacation, family visits, or sightseeing
- e-Business Visa – For meetings, deals, or conferences
- e-Medical Visa – If you’re heading to India for treatment
- e-Medical Attendant Visa: For accompanying patients.
- e-Conference Visa: For attending conferences.
How to Apply:
- Go to the official portal: indianvisaonline.gov.in
- Fill in your details and upload your passport and photo
- Pay the fee online
- Get your ETA (Electronic Travel Authorization) via email
- Print it and carry it when you fly—easy!
- Important: Apply at least 7 days before your travel date. Your passport should have at least 6 months of validity left.
Step 3: Need a Longer Stay or a Different Visa Type?
If you’re planning to stay for more than 60 days, or your travel purpose isn’t covered by e-Visa, go for a regular paper visa.
Here’s what to do:
-
- Start your application online: indianvisaonline.gov.in
- Print the form and submit it (along with photos, passport, etc.) to your nearest Indian embassy or visa center
- You may be called for fingerprints or an interview
- Once approved, the visa is stamped in your passport
- Processing times vary, so apply well in advance!
Step 4: Consider Getting an OCI Card
- If you’re of Indian origin and now hold foreign citizenship, the OCI card is a game-changer:
- No need for a visa—ever
- You can stay in India as long as you like
- You get most rights that NRIs have (except buying farmland)
- You can even apply for your kids.
- Apply or renew your OCI here
- Step 5: Need an NRI Certificate?
Sometimes, you might be asked for an NRI certificate—for property transfers, bank accounts, or school admissions. To get one:
-
- Fill out a form (each consulate has its own process)
- Provide your passport, visa, proof of residency abroad, etc.
- Pay the fee
- Submit it in person or by mail
Some Key Links
Final Tips
- Double-check your passport expiry before you apply
- Print out all documents and carry physical copies when traveling
- Don’t wait till the last minute—some applications take time
- When in doubt, check with your local Indian consulate

